I installed the new drivers side front brake cylinder and rubber hose. Using that brake “pliers” makes the job freakin’ a breeze. I had no idea how to use the bottom section of the tool and did a little youtube research. It’s the most important function of them all! Removing the upper springs from the pivot bolt has always been one of those watch out for the flying springs moments. This tool makes it a breeze.
I took the 64′ Hard Top out for a test drive and stomped on the brake pedal. No more hard pulling to the right. The old cylinder was so rusted and frozen solid I literally only had 3 brakes working driving back from Waterford, CA. when I first purchased it.
There is a slight soft pedal action and I will do a full bleed again once I have someone I can snag for an hour or so. It’s a pain in the ass gravity bleeding a brake system.
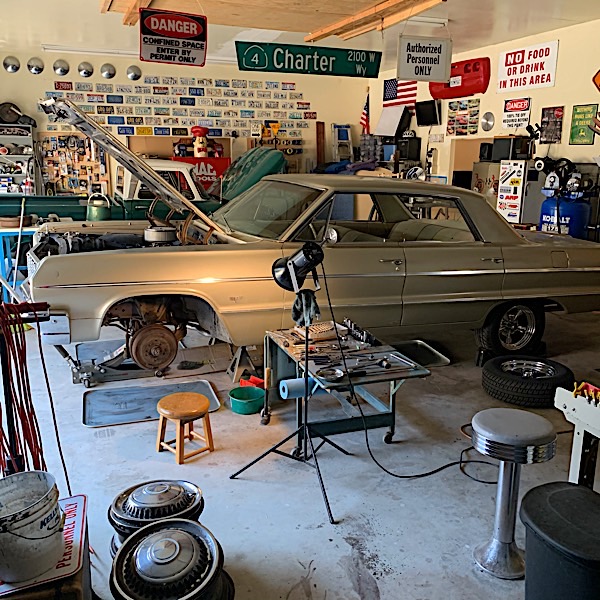
Well, I’ve been looking at this 1964 Impala SS for a few weeks now. If everything turns out right I’ll be getting it next week sometime. This is a Canadian built GM Impala that is pretty much stock as can be.
This ride is unmolested in regards to being all chopped up sheetmetal wise or frame notched. If the deal works out it will come with a brand new air ride system. The air ride will be a 5 gallon tank, two Viair compressors, mono block assembly and all the other supporting hardware.
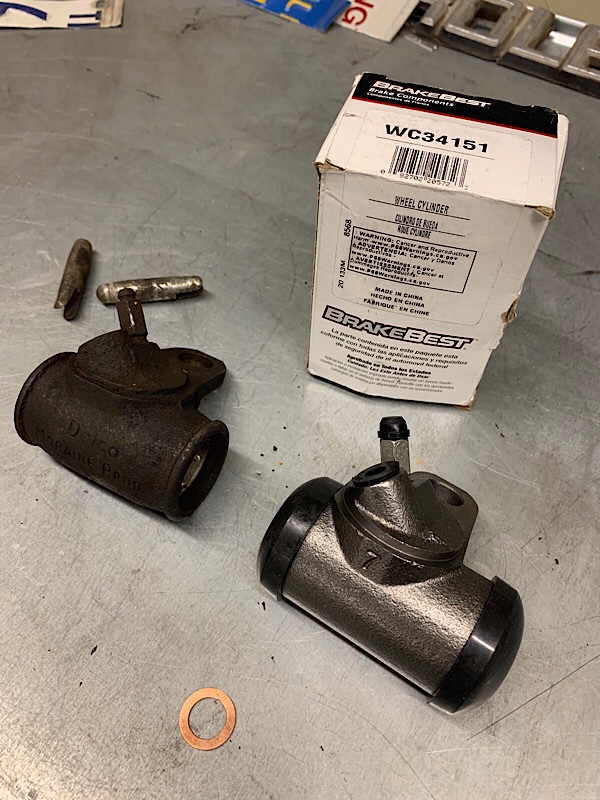
Picked up the driver side brake cylinder on the way home from work.
UPDATE: picked up the passenger side cylinder and rubber brake hose. I figured I may as well replace both sides since the drums are already off each side.
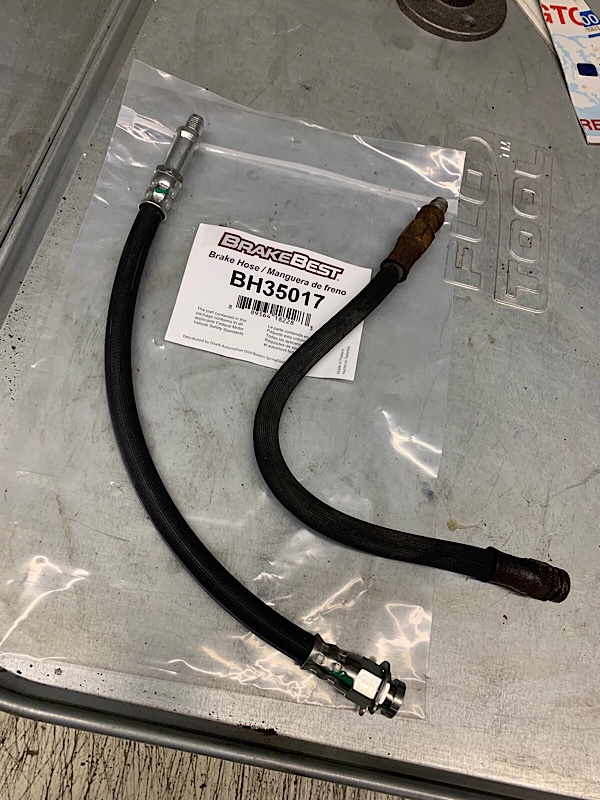
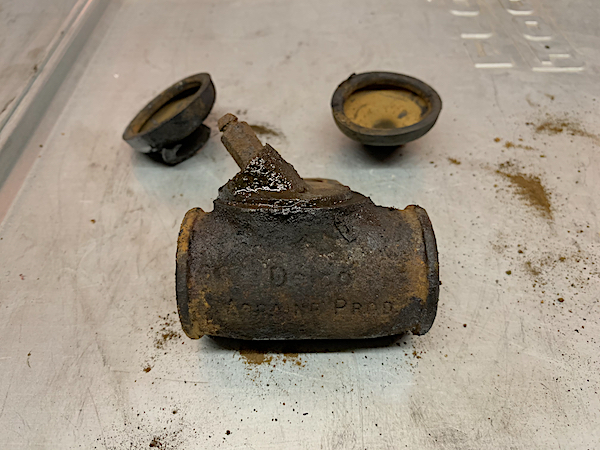
I also grabbed the rubber hose that connects to the rear of the brake cylinder. I took a gamble and bought the longer of the two hoses available at my local parts store and it turned out to be too long, about 8mm. I’ll pick up the shorter hose tomorrow and use the longer hose on the passenger side where it probably belongs.
When applying extra pressure to the brake pedal the Impala will veer hard right. By applying normal pressure the car will stop with a slight pull. It would seem the drivers side front brakes is not working properly and the passenger side is doing most of the work.
The rubber hose was visibly intact but no telling how it functioned with brake fluid and pressure applied. I’ll be replacing the hose as a maintenance precaution. I need to research the hose length. It turns out there are two different sizes but not by much. I went and ordered the longer part. It’s approximately 8mm longer. I’d rather have to much hose then not enough.
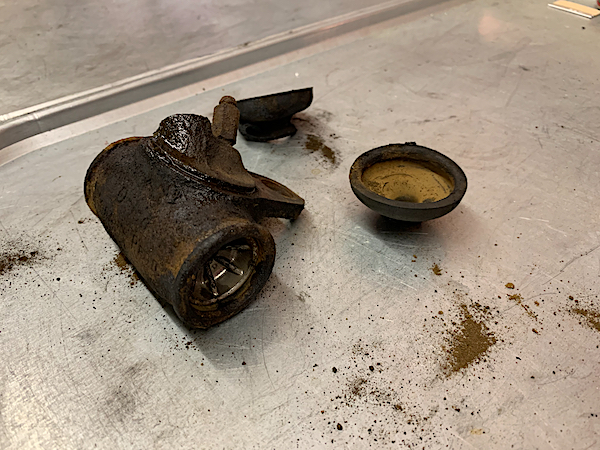
The driver side brake cylinder was completely seized and rusted out. The official service manual specifies a piston to cylinder gap between 0.003 to 0.006. This part was so crusted with rust you couldn’t slide any gauge in between. I ordered a new part, there is a left and right replacement part.
I may have to replace the passenger side brake cylinder if I’m unable to crack open the bleeder valve. My first attempt on the passenger side to see if it would break free was unsuccessful.
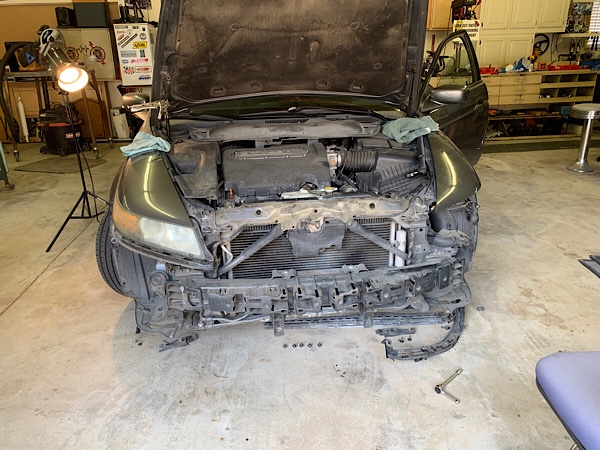
Spent Saturday morning getting the shop ready for my sons ballast removal on his 2006 Acura TL. What a freakin’ bitch it is to get to the actual part. You literally have to remove the entire front bumper assembly along with supporting brackets and covers. Not to mention the battery has to removed too.
The front looks like it had been in a accident.
I don’t know what a shop would charge but accessing the lower bumper screws and fasteners is difficult because of the low stance.
The single peace bumper is very lightweight.
Once the bumper and supporting hardware is removed you’re able to remove the actual headlamp which has the ballast attached to it on the underside.
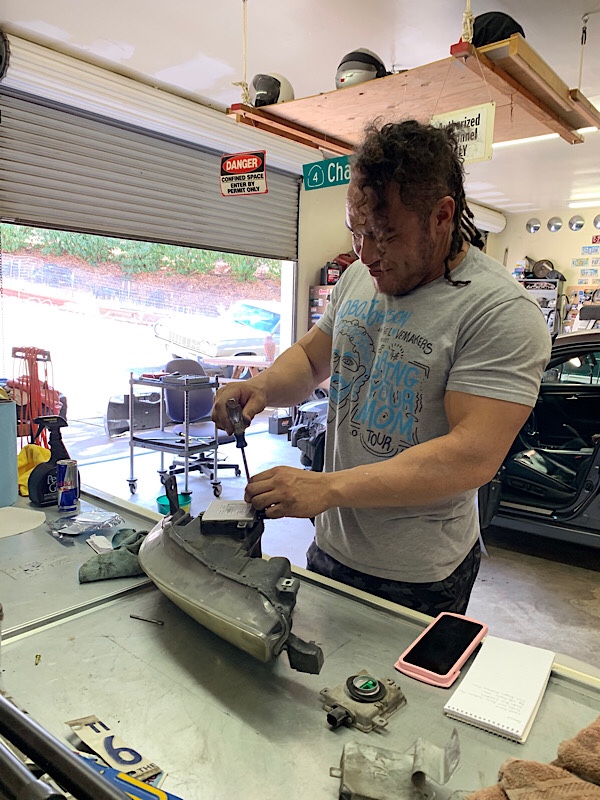
Vincent replacing the ballast assembly.
It turned out that the left blinker lamp wasn’t working so a quick trip to the auto parts store was needed.
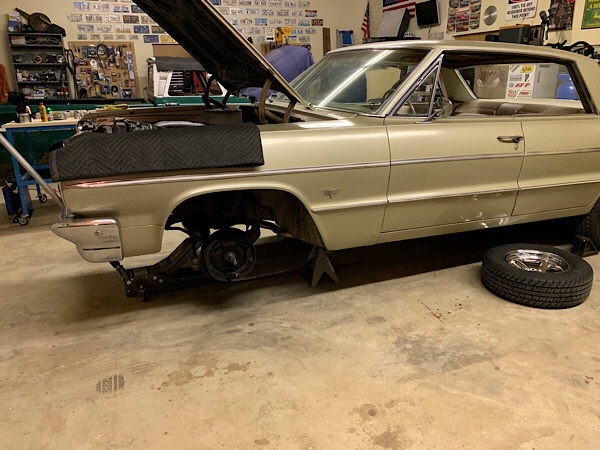
Took the driver side wheel drum to Lee’s Automotive which is located just down the street from my work. I’ve taken other drums from various projects and they have alway had a quick turn around.
As expected they finished turning the drums before lunch time. I went and picked up the freshly turned part during my lunch break. How convenient is that!
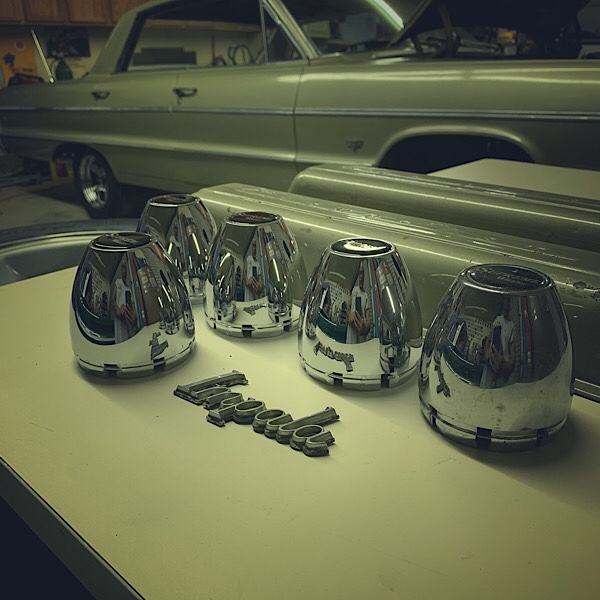
While checking out the Impalas front suspension. I noticed the worn parts underneath. This is like the proverbial chase a rabbit down the hole. There is a lot to be addressed under the suspension. The items that affect functionality will be be fixed first. Any cosmetic upgrades will be done at later date unless it makes sense to do it now. As an example, I want to paint all the drums black since you are really able to see it now due to the Supreme wheels I installed. The front wheels are off so this is a good time to do it.
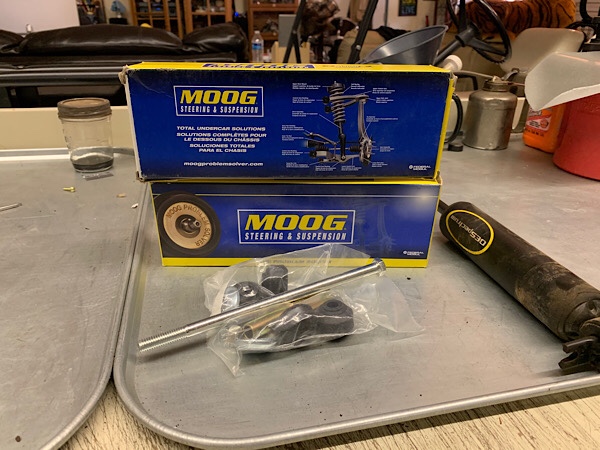
I picked up a couple replacement front stabilizer bar links. These included the long bolt, bushings and plates.
The existing linkage appears to be the original pieces which would be hard to believe. It would seem by this time 54 years later the rubber parts would have been replaced. The linkage rubber was so bad it literally crumbled while trying to remove it from the stabilizer bar. You can the huge difference between the old and new parts.
Installed the new MOOG linkage kit. I had to use a jack stand under each drum and elevate the entire A-arm assembly to get the new set in. Almost like simulating a wheel was mounted and in contact with the ground. There was no way for me to get it installed with the frame just sitting on the jack stands.
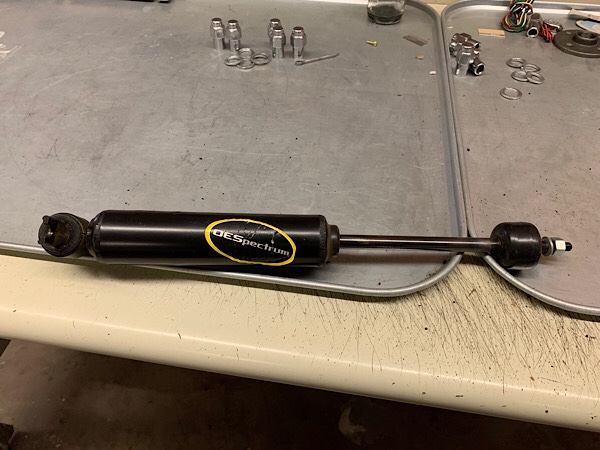
While the car was jacked up I went ahead and pulled out both shocks to see if each were functioning correctly. These seem to be fine and expanded out once compressed. These shocks are not stock and had the name “OE Spectrum”. After a bit of research I found that the Monroe Company makes this model.
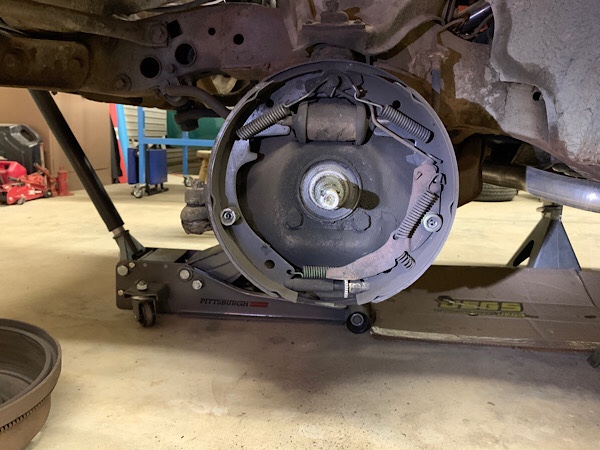
Once again, since I had the front wheels off and the car jacked up I started looking into the braking system. When using the brakes aggressively the car will want to veer to the right. This is a consistent and repeatable issue.
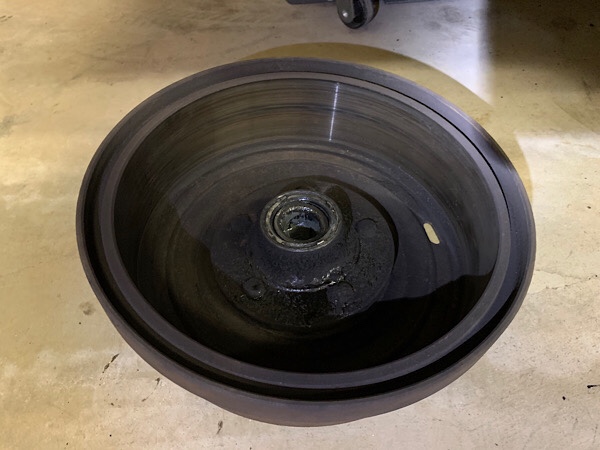
I had a hell of a time getting the drum off. I had to use the star adjust and set the brake shoes to the maximum distance away from the inner drum. It took a lot of turns to get the hub off. This is due to the brake shoes wearing the drum and developing a ridge along the outer edge. The star adjuster was designed for this type of situation. There is an access hole/slot on the web section, you can insert a tool or slotted screw driver to turn the star screw.
The drum is going to need resurfacing done. I’ve seen replacement drums online that are very inexpensive. I’m not to thrilled about using some cheap ass metal. I measured about 0.102” so I believe I’m still within the range to still safely have the drum resurfaced.
One thing nice about this older drum style brakes is not having to pop out bearings and having to use a press to re-install a set of bearings. The center section of the hub is removable and it has the collar attached.
Ridge developed around the hubs outer rim.
Wrapping it up for tonight. I’ll need to take the drum over to wheel shop that can still turn old style drums. There is a shop at Rancho Cordova, CA. that has the equipment and personnel that can run the old time machine.